Why DIY Projects Bring Families Together
When families work with their hands, something real happens. It’s not just about gluing things together or hammering nails—it’s the quiet exchange of smiles over a job well done or the shared groan when something doesn’t go as planned. These moments stack up. Shared tasks build trust, deepen communication, and create memories that stick longer than anything on a screen.
Kids pick up real-life skills in the process—problem-solving, patience, and how to safely handle tools. Parents get something too: the chance to lead without lecturing, to model curiosity and imperfection, and to soak in the simple joy of watching their kids figure things out. There’s also a boost in confidence for everyone when the project wraps up, messy edges and all.
And the best part? It doesn’t take much. Most DIY ideas can be done with materials lying around the house. A shoebox becomes a spaceship. An old T-shirt turns into personal fashion. These aren’t just crafts—they’re low-cost ways to bond, build, and break the routine. Families don’t need big budgets, just a little time and a table to gather around.
Project 1: Handmade Birdhouses
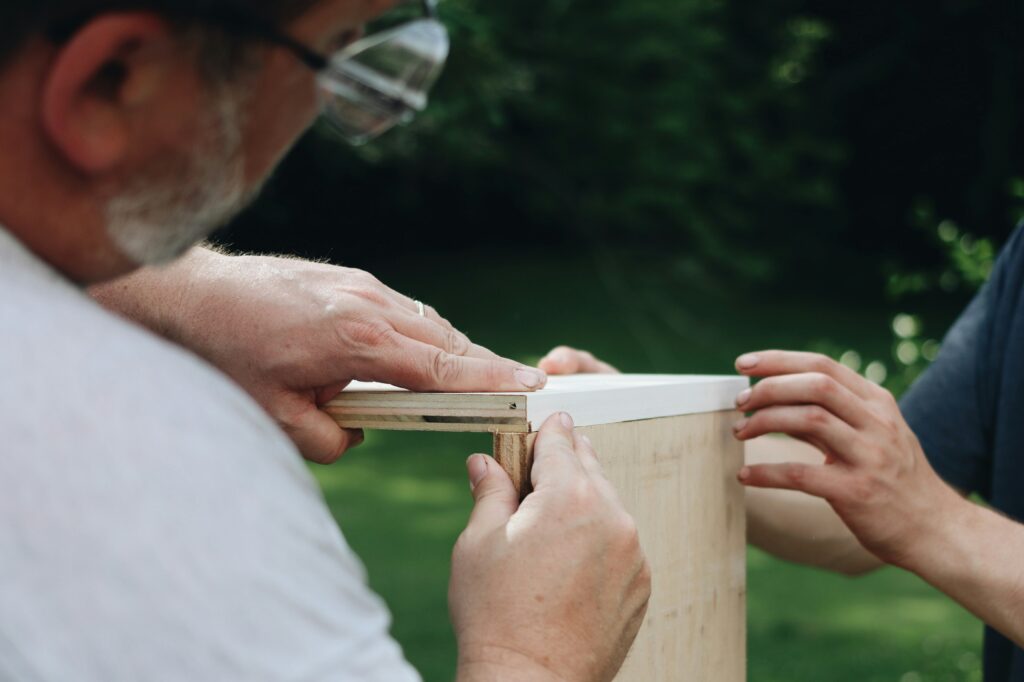
Building a birdhouse is one of those rare projects that checks all the boxes: creative, useful, and a gateway to a good chat about the outside world. You don’t need much to get started:
Materials:
- Wood scraps or pre-cut birdhouse kits (pine or cedar works best)
- Nails or wood screws
- Hammer or screwdriver
- Non-toxic wood glue (optional)
- Exterior paint or natural wood stain
- Sandpaper
- Safety gear (goggles, gloves for younger kids)
Step-by-Step Guide:
- Start by sanding down any rough edges on the wood. This prevents splinters and gives you a clean surface to work with.
- Lay out the pieces and walk everyone through the layout—floor, sides, roof, and front panel (with a 1.25″ hole for entry).
- For younger kids, pre-drill pilot holes or let them hold nails while an adult hammers. Older kids can do guided hammering or screwing with supervision.
- Once the structure is up, seal any gaps with wood glue, if needed. Let everything dry before painting.
- Paint and decorate. Use non-toxic, weather-safe paint if you plan to hang the house outside.
- Let dry completely before placing outdoors.
What Kids Learn:
- Basic tool safety: how to hold a hammer, why you wear goggles, what a nail does.
- Observation skills: once it’s up, watching which birds visit can lead to great nature talks.
- Responsibility: maintaining the birdhouse, checking it through seasons.
Handmade birdhouses are more than weekend fun. They plant tiny seeds about ecosystems, shelter, and craftsmanship—simple stuff with long echoes.
Project 2: Custom T-Shirt Printing
This one’s as simple as it gets—and still a hit. All you need is some plain cotton T-shirts, a handful of fabric paints or iron-on transfer paper, and a table you don’t mind getting messy. Lay out the materials, cover the surface, and let the creativity unspool. Whether it’s stencils, hand-painted designs, or transferred images, kids get a real kick out of wearing something they made.
The best part? They’re in charge. Let them sketch out rough drafts or just free-hand it. Some will go abstract, others will turn to cartoons or slogans. There are no right answers—only wearables that scream personality. And if it turns out looking like a mess? That’s part of the story.
Beyond the fun, this is low-key a lesson in ownership. Designing their own shirts gives kids a way to express who they are without saying a word. And they’ll wear it with pride because they built it themselves. No filters. Just fabric and imagination.
Project 3: Indoor Herb Garden
You don’t need a backyard to grow your own herbs. Small-space gardening is easier than most people think—perfect for window sills, countertops, or that random sunny spot by the fridge. Start with low-maintenance picks like basil, mint, chives, or parsley. These herbs grow fast, smell great, and bounce back even if kids forget to water them for a day or two.
Forget fancy pots. Hunt around your house for containers with personality: old mugs, tin cans, yogurt jars, or anything that can hold soil. Just poke drainage holes in the bottom and line the inside with a coffee filter to keep dirt from spilling out.
To keep the project kid-friendly and sustainable, make watering part of a daily routine (like brushing teeth). Label each herb with handmade signs, and let kids track growth on a simple calendar. Quick wins—like snipping leaves for a garnish or sandwich—help kids see the full loop from dirt to dinner.
This is one of those DIYs where the payoff is visible, edible, and legit fun.
Project 4: Recycled Art Wall
Give new life to everyday materials and foster creativity with a Recycled Art Wall. This family-friendly DIY project is all about transforming household waste into vibrant, ever-changing artwork everyone can contribute to.
Materials to Gather
Start by collecting a variety of common household recyclables:
- Cardboard scraps
- Bottle caps and jar lids
- Old magazines and newspapers
- Fabric remnants
- Egg cartons and cereal boxes
- Buttons, string, or leftover craft supplies
Organize these materials in labeled bins to keep your art station ready for spontaneous inspiration.
Creative Challenges for the Whole Family
Keep things exciting by setting up themed challenges. This turns art-making into a fun (and often hilarious) game that encourages participation across ages.
Theme ideas include:
- Nature scenes using only shades of green
- Abstract sculptures with cardboard and tape
- Portraits made from magazine cutouts
- “One-color only” designs with any material
Allow each family member to interpret the challenge in their own unique way. There are no wrong answers—just endless opportunities to create.
Making It a Living Gallery
Instead of storing everything in drawers, put your art on display! Dedicate a wall or corkboard to your new masterpieces. Rotate artwork regularly to keep the space fresh and inspiring.
Tips for an evolving display:
- Choose a “Featured Artist of the Week”
- Create a gallery opening night with snacks and commentary
- Photograph older artwork before taking it down to keep a digital archive
Over time, this wall can tell the story of your family’s imagination and growth—with laughter, glue, and a few scattered bottle caps along the way.
Project 5: Build-A-Box Fort
All it takes is a pile of cardboard boxes, some heavy-duty tape, a handful of crayons, and a little bit of imagination. That’s the startup kit for an afternoon of pure creative play. Kids can design their own blueprints, decide where the tunnels go, how tall the tower should be, or whether this week’s theme is jungle hideout or outer space command center.
The fun isn’t just in the building. It’s in the decision-making, the failed tape jobs, the structural do-overs, and the occasional collapse that sparks a new design. Kids begin to grasp spatial reasoning without realizing it. They troubleshoot in real-time, learn how to brace walls or widen crawl spaces, and figure out how to turn a couch into a castle turret.
Fort-building is problem-solving in disguise. And when the blue crayon wall decorations meet the duct-taped drawbridge, you know they’re not just creating a fort—they’re building skills that stick.
Bonus: Weekend Maker Station
If you want DIY to become part of your family’s rhythm, don’t wait for the perfect moment—make space for it to happen anytime. A weekend maker station is low-stakes, high-reward. Choose a corner of the living room, an unused hallway nook, or a chunk of garage space. A small table, a crate of basic supplies, and a few bins can go a long way. Keep it simple, but visible. When projects feel easy to start, they actually start.
Let kids lead. This isn’t about crafting a museum piece—it’s about helping them take ownership over their ideas. Whether they’re building a paper city or transforming toilet paper rolls into rocket ships, let them set the pace. You’re there to encourage, not supervise with a clipboard.
Safety matters, especially when tools are involved. Use labeled bins for scissors, glue guns, rulers, and tape. Store any sharp or adult-only tools out of reach but still within the space so they feel accessible with guidance. Reuse old jars and lunchboxes to group supplies. The goal is organized, not rigid.
A DIY zone isn’t about perfection—it’s about giving kids the freedom to dive in. Keep the space stocked, accessible, and ever-evolving. That’s where the magic happens.
Tips for Smooth DIY Sessions with Kids
First rule: match tasks to the kid, not the other way around. Small hands can stir paint, place stickers, or line up recycled materials. Older kids can measure, cut (with supervision), or lead design ideas. Giving everyone a role they can own keeps things fun and minimizes frustration. Nobody likes being assigned the task they can’t quite do yet.
Next up: the mess. It’s going to happen—paint splatters, paper scraps, sticky glue fingers. Instead of fighting it, prepare for it. Lay out a drop cloth or old newspapers, keep wipes and a trash bin nearby, and resist the urge to micromanage every drip. Creativity thrives when kids don’t feel policed. Clean-up turns into part of the gig, not a punishment.
Lastly, celebrate outcomes, not perfection. Finished projects can be proudly displayed—but even the lumpy or leaning ones deserve praise. Failed efforts? That’s the raw material of learning. Frame it as experimentation, not errors. DIY day is about process, not polish.
Final Thoughts
DIY with the family isn’t just about hot glue guns and googly eyes. It’s about slowing down and doing something real—together. Whether you’re building, painting, growing, or repurposing, these hands-on moments open up space for conversation, laughter, and learning. You don’t need a craft store spree or fancy gear. Just imagination, a little time, and a shared spot at the table.
When you create with your kids, you’re not only making projects—you’re making memories. That’s the stuff that sticks, even when the paint fades or the cardboard collapses. And if you’re ever short on ideas, MomSmartHub is full of fresh projects to keep the inspiration going.